Showing posts with label projects. Show all posts

Friday, February 14, 2014

Happy Valentine's Day!

I know!  Three posts in less than four month-spaced increments...nobody freak out.  We all just need to stay really calm and read on.  Yes, yes I did just type that.


The hearts in the pots are the extent of my Valentine's decorations this year.  It is better than the previous year that had a whole lotta nada.

Now I must share my roadside find.  Can you believe someone threw out that mid century modern shelf/curio cabinet?!?!?!  Admittedly is was broken on one side, but I showed it some drilling, wood glue and dowel rod love and then put the same on the other side so it would look the same and it is good as new!  I love me some trash to treasure!  It is supposed to have sliding glass doors on the front, but only one of the pieces of glass was still intact.  I may or may not try and get another made and reinstall them.  I also may just use that brown board stuff hanging out against the wall to the left there (can't remember what its called right now) and make 2 door panels with recessed pulls...or I may just leave it open like this...  I don't know yet.  It is completely awesome regardless and I am loving it!  When I get our bedroom sorted out, I'll take pics in there to show what I did with the entryway table I built back in the summer.  I feel like my Heavenly Daddy just gives me a kiss and says, here ya go..here's a gift for you, when my path intersects with fun finds like this.  I know it seems like an odd gift to some, but its along the same lines as Sam giving me power tools and gadgets as gifts.  I'm just that kind of woman.

I decided to split up the kids into separate rooms again.  It seems to be working better.  I found a full-sized bed for the girls room.  I was going to try and find a set of bunk beds for them, but realistically, they wouldn't sleep in them.  They would end up on the floor.  Plus, we really need something for when people come to visit and stay the night.  So far the full size has worked very well...once they actually go to sleep.  I'm having lots of fun putting both of the rooms together.  Today, I am in the process of putting together a paper chandelier for the girls/guest room.  This is my inspiration:


Its so, so pretty!  I really love how she pulled all of the elements together in her nursery. I have plenty of paper pom-poms from previous birthdays, but I wanted to add a few of these:
(the link for this is ladybird-ladybird-paige.blogspot.com , but the blog is no longer there...)

So, this is my version:

I was finally able to use up quite a bit of scrap book paper I've collected over the years.  I'm hoping I get to finish out the whole thing today some time, but well, it may run over into tomorrow's activities.

I still have a bedspread/quilt to either buy or make for the bed.  I decided on the fabric for the curtains, but still have to go buy it and sew them up.  I still haven't decided on a rug, but I've got a couple to choose from in my stash and if those don't work, then I'll be on the look out for a new one.  Then, I'll deal with the walls and what to put on them.  No biggie, right?!

Last night, when the girls finally went to sleep, I got some sleeping pics of them.  I attempted to do the same with the boys, but there was no light at all in their room.  Then we had a bit of an impromptu photo shoot.


I would just like to point out that not one time did I use an emoticon in this post....not once!  It was a struggle, but I proved it is possible.  In future, I will probably overcompensate for this post with random, ill-placed smiley/frowny/disturbed faces in other posts....it'll make me feel better.

Friday, August 31, 2012

Fall, Fall, Please come soon!

I think I'm trying to will it to turn Autumn.  Maybe, just maybe if I decorate for Fall, it will just decide to capitulate.  It could happen.  Really.

I've never really decorated for Autumn or Thanksgiving or any of that.  I think I always felt the it was way to close to decorating for Christmastime and therefore too much work and more overwhelming than I needed to mess with. :)  This year, for some strange reason, I am inspired!  I'm wanting to just have a fun two seasons.  Fall is my favorite time of year, followed by winter as a close second.  I have some interesting ideas for the environment I would like to create in my house for my family and I don't want to do it last minute, so I'm getting a head start on my project list for the holidays.  Then, perhaps, I will be able to chill out and just enjoy the season!  It could happen.  No, I really mean it. :)

Okay, so here is the first in my series:

 These made me think of Cinderella....shiny.

I found these unfinished ceramic craft pumpkins at Hobby Lobby for 40% off, hey-hey!  Love Hobby Lobby!  Anyway, some burnt umber acrylic paint for the stems and the grooves and then some gold glitter for a bit of bling and I really like how they turned out.

These rather large acorns, too, were 40% off and all they needed was a little glitter to top them off.  Shiny makes me happy. :)

I've got some other items in the works and I'm pretty exited to see how they turn out.  I'll give you a hint.  Topiaries.  That is all for now.


Tuesday, July 10, 2012

Busy Bag Alooza!

I am involved in a busy bag swap and I am super excited!  I had the opportunity to be a part of one back in the winter, but I just couldn't get myself together enough to participate. :(  Now, I find myself NEEDING busy bags for my two middle kiddos.  NEEDING, I say!  So, I am going to put a list of as many busy bag ideas I can find on here.  Its gonna get all crazy up in here, so watch out!

#1 - Art bag - small notebook, short colored pencils or crayons and stickers.  Here is a good example.

#2 - I spy bag - no sew tutorial here, but I would just run a stitch along the inside edge of the zipper to make sure little fingers can't open it....or you can glue a ribbon over the zipper.

#3 - dry erase kit - example found here

#4 - popsicle stick puzzle

#5 - sensory balloons

#6 - felt faces

#7 - felt dress up dolls

#8 - button snake

#9 - pipe cleaner activity

#10 - felt monsters

#11 - #a lot:) - this blog has bunches of options!

Okay, maybe not so crazy up in here per se, but that last link is a doozy!  I just got tired of posting it myself.  Why do that when someone else has already done all the leg work?!  Well, should you choose to accept this mission....it should at least prove interesting! :)


Monday, June 25, 2012

Shirt Reconstruction and some blingy-blang!

I've been on Pinterest waaaaay too much lately.  I'm highly involved with wanting to makeover my wardrobe.  I've got some skirts and shirts that are on my hit list.  I've already turned a sweater into a skirt.  I found a shirt at Academy that I altered and then I had this shirt that a friend of mine gave me that was too big on me and totally not my style, but I love the fabric. The stripes have a shimmer.


 I came across this amazing blog:  brassyapple.blogspot.com and saw this shirt recon:

Um, yes, please!  So, the blue shirt became this:

(I'm a wanna-be poser;)

I intend to tweak the sleeves a little more so that I have more range of motion.  I have several more reconstructions on my agenda,mostly from brassyapple's site, but there are a few more on my pinterest board awaiting my attention, too.  Love tweaking stuff that I already have!

I'm not one to hop onto fashion bandwagons usually, but I love me some shiny stuff and the jeweled jeans have caught my attention.  Now, anyone who knows me knows I will not spend money on something like that.  I will, however, trot on down to Hobby Lobby with my 40% off coupon and buy a case full of different sized acrylic gems and bling my jeans myself.  Yes, yes, I will.  (Me, trotting...funny visualization.:)

So, here they are:

(Pay no attention to the downward gravitational shift of my bum.)

I honestly don't think there is enough bling on them, so I intend to outline the entire pocket.  SHINY!

There was this shirt that I spray painted MOM to the 4th on and it didn't quite turn out as hoped, so I thought it could use some shiny, too.


I also put some gems on my shoes, but there was an incident involving me holding Brea and tripping over Ailey when she decided to swerve into my lane.  Some of them came off and I haven't fixed them yet.  

I have more bling sessions in mind, but for now I think I'll take a break before everything I come into contact with gets a shine enhancement. ;)


Friday, June 1, 2012

Kitchen still in transformation...

Sam's parents came for Memorial Day weekend and got in some great time with the kids and helped us finish another phase of the kitchen update project.  Sam took out the breakfast bar that used to nearly block off the kitchen last weekend which completely opened the whole thing up.  We can now both be in there and not have to play bumper bums and elbows. We also don't have a bottleneck trying to get in and out of the kitchen now.  So much better!  The next goal was to take out the prep area and make that area and the existing pantry next to it one big pantry with bifold doors and shallower shelves.  It was only supposed to get as far as the framework and the sheetrock done.  We were to get the doors and the wood for the shelves next weekend after pay day. ;)  However, we would have had a dining table full of pantry items until that happened and Sam's parents wanted to make sure all that stuff could go back into the pantry.  So, for early birthday presents, they wanted to gift us the doors and shelving!  Isn't that amazing?!  So, Memaw a.k.a Sam's mom took us to the store and I picked out the doors and Sam picked out the wood and a couple of other items to make it all work.  Sam and his dad a.k.a. Pepaw went back to work and we now have an AMAZING pantry!  Our kitchen feels like a whole new room already and I haven't even textured and painted the walls or finished refinishing the cabinets, countertops and all else waiting in the wings in there.  Its truly refreshing, I can tell you!  You know, cuz I'm telling you right now. ;p  Anyway, I believe I have a before pic of the kitchen from when we first moved in, but I want to do a side by side when its all said and done, so I'm just going to post a pic of where we are at this point. ;)


(Pay no attention to the craziness that is my kitchen.  We are only focusing on the pantry to the right and the fridge there in the back.  Let's all remember that this is a work in progress.....;)

I cannot express what a fantastic present this is!  Thank you Memaw and Pepaw for your time, handiwork and materials to make this possible!  Thank you, thank you, thank you!!!

Also, the fridge that was here when we moved in had to go on a journey elsewhere.  It would make an alarming noise every time the compressor kicked on or off since we were introduced to it, but a couple of weeks and some days ago it started making a sort of chugging sound the whole time it was on.  We both took that as a sign that it wasn't going to be keeping our food cold much longer, so I got online and started scoping out possible fridges.  I'm a fan of Kenmore and found this one at Sears.com:

Kenmore 19.7 cu. ft. Bottom Freezer Refrigerator ENERGY STARĀ® at Sears.com

They were running a sale at that time and it was just under $700.00  I really like the freezer on the bottom, but 700 is a lot little more than I wanted to pay.  So, I got on craigslist and found this one:


It was $350.00 and only two years old.  Yeah, mo bettah.  We went to look at it and I totally didn't think about dimensions or whether it would actually work in the space in the kitchen... God was more than merciful with this whole thing, He was most gracious!  I offered $300 for it and that was accepted!  Score!  We got it home and it didn't quite fit, but Sam only had to make a minor, um, "adjustment" to the cabinetry above it and it went right on in!  I love that man! ;)  It also has an icemaker, which I'm excited about.  Sam is going to make some alterations to the plumbing under the sink....again (he had to in order to install a filtered water faucet for me a few weeks back ;) and we will have auto ice!  Woohoo!  Its the little things, really... :)


Wednesday, May 23, 2012

Recent Projects

I've been busy as usual, but I haven't really been putting my projects on here, so I will do that now.  I have other posts in progress, but there's a bum-load of pictures involved so it just takes a while for those. ;)

Today, I finished pillow mattress #2.  I saw the tutorial on them here at Southern Disposition's blog and was pretty excited when I saw her materials list.  She got 1 twin duvet cover and four 99 cent pillows from Ikea.  Well, I just had to go ahead and pick that up while I was there about a week or so ago. ;)  Her cover was cheaper than the one I found, but for less than 20 bucks, I got two out of 1 cover and 8 pillows.  I still can't get over the 99 cent pillows.  99 CENTS! I am in total like with Ikea. :) Anyway, here are the ones I made:


I also had to make up some hair bows for a little girls birthday a couple of weekends ago.  I hadn't made any in quite a long time, so I had to get back on youtube to have a refresher course.  I must say that these turned out waaaay better than the first set I made a year or so ago. :)  I also like that they are more over the top than the others, too.  Big honkin' bows on little girls heads just = cuteness to me.  Here they are:


I got some super cheap sheets at Ikea while I was there because I had seen this Super Hero Fort Kit on Meg + Andy blog and knew I needed to do that for the boys...well, at least part of it.  They kept taking the sheets off of their beds to build forts and it was getting really old trying to put it all back together all the time. :(  Anyway, at first we used clothespins to hook it to the bunk beds, but between Brea's and Ailey's efforts, it kept getting pulled down.  I had just bought some rope for use at our homeschool group field day and wrapped it "strategically" around the bed and just draped the sheets over the ropes.  Aaaahhh...much better.  That solved the problem of having to go in a bazillion times at bed time to fix the fort.  Here's what the kids have done with it so far:


Braden used the excess rope end to make a divider inside, too....

After making that, Ailey wanted one for her bed, so I set out on Google to see what others had come up with.  I was looking for something that didn't require sewing and used stuff I already had.  I came across this idea here at The Better Nester.  I didn't do it exactly, just used it to stimulate ideas to use with what I had.  I may or may not do more to it...works just fine the way it is.  Here is what I came up with so far:


Our yard was in VERY sad shape after the drought last year, so I went to work taking dominion over that thang! Its finally starting to make a comeback, but it will need more time.  Also, the garden is in process, as usual....I think I'm going to have to start it in November for it to produce anything in the spring. ;)  Anyway, here is all of that in progress:

The front porch had that icky green fake grass outdoor carpet covering it and I decided it just needed to get taken off.  It had it on the back porch, too, and after just letting the weather do it thang to it, all the gunky glue came mostly off of it after a while.  I figure by the time I get ready to clean it off really good and stain it, I won't have much scraping to do. ;)


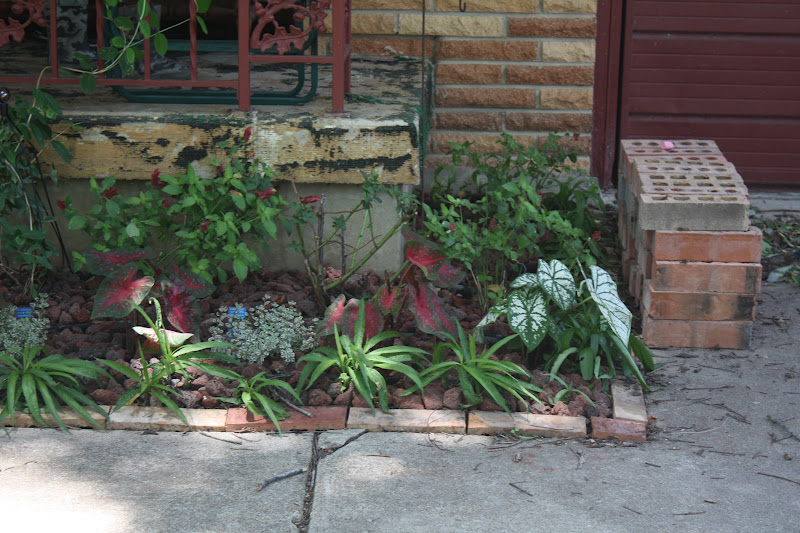
This is the front right flower bed.  I took out all the bulbs that were in it, took out the fluted brick edging that didn't match and looked dated and then attempted to restore some order there.  There's a rose bush taken from a random spot in the front yard as well as some type of flowering plants taken from the back yard.  I had gotten that honey suckle last year and just planted it there in the hopes that it would survive and it did.  Yay!  It is now being trained up the railing.   The border plants next to the bricks I got from one of the other flower beds and I have no idea what they are, but they make a nice bushy border. :)  The bricks were free from a friend.  I also put a soaker hose we already had and lava rocks in.   All the beds were in chaos.  Lots of overgrown and not taken care of going on in them.  Slowly, but surely I am going through each of them and rearranging and adding a bit.  

 This flower bed is to the left of the front porch and it had some really sad looking hawthorn bushes in it.  There are still two left that are giving me a run for my money, but they WILL come out!  Also, where the drain spout it was all loaded with dirt from many years of build up and when I got a hold of it, I found all kinds of buried bricks and stone.  I just dug them out and put them back on top in an orderly manner.  Much better.  I put stepping stones all the way around so I can get to the other beds without tramping on the grass trying to come back in.  I aim to bury one per day until they are all mostly level with the top of the ground to make mowing easier.  I've got them going out to the mailbox, too.

 That pile of bricks there came from our neighbor behind us.  They were free, too. :)  They will be going in as the border for the other front flower beds.

There are some of the bare spots with new grass coming up.  It looks kinda pitiful now, but it was worse. 

 This bed is going to be a challenge...There are lots of bulbs in it, mostly tiger lilies.  I have to dig them out and try to dig out that wandering jew, too.  I don't want it in there, it just takes right over. :(  I have some irises and amaryllis in the back yard and will rearrange this bed to accommodate them all, but much more organized.  There are also some chrysanthemums on the side of the house that will find a new home here. :)  That black bowl thing is my place marker for a bird bath.  I am on the lookout for one...preferably a cast off that won't cost a thing. ;p

This bed has a rose bush and jasmine.  I would like to get some sort of wrought iron gate thing or some sort of large trellis to create a bit of privacy there.  We shall see what comes my way. :)

Ailey had to be in most of the pics...:)  This is the back yard in all of its skeeriness.  The kids have really done a number on it.  That HUGE bare spot is being worked upon now.  Gonna see if I can coax some grass back in there.  Eventually, the plan is to make a semicircular patio with a pergola over it off of the small back porch there.  We'll see. 

 The garden.

 Herbs are up at the front there and there is some lettuce and kale in the middle and garlic at the other end with the rest being tomatoes.  The big huge bush there is oregano and it likes to take over.

The pot has Sam's habanero plant from last year.  He hasn't given up on it.  It has lots of blooms, but something keeps eating the little peppers on it. ;)  Poor Sam!  The bed has strawberries, okra, more habaneros and zucchini.  There was more planted, but it hasn't shown up as of yet.  I'm probably going to have to start those inside and see if I can get them to grow.  I may not, though....depends on whether I feel like it or not. ;)

We've also got a lot of remodeling going on inside the house, but most of it is in mid process.  I still have to finish getting the wallpaper backing off the walls in the bathroom and then I will texture and paint.  I have to sand and repaint the cabinetry, too.  I am considering putting in an exhaust fan, so before the texturing and painting, I will have to cut into the wall to run the wires and also cut a hole in the ceiling.  Then, I would have to patch the wall.  It would be a good thing because there is no ventilation in the bathroom if the window if closed.  

Sam is venturing into building a bigger pantry out of the one that is in the front part of the kitchen already and the little inset prep area right next to it.  He's going to frame it out and then build some shelves in there and then he will install bifold doors there.  We are also going to get bifold doors for the other closet/pantry/craft room at the back of the kitchen.  We will replace the hot water heater door with a new door that matches the bifold doors, too.  Then, there will be texturing and painting going on for a while after that.  He also plans to cut out the subfloor and replace the terrible particle board with plyboard and then we will paint that and lay linoleum tile down.

In the meantime, I have been slowly refinishing the cabinet doors. Ugh.  Such a big, time-consuming job!  I am painting them an off white and replacing all the hardware.  I finished two doors and put a poly coat on them and I don't like it at all!  It has yellowed and the polycoat is streaked making it look even worse.  I'm gonna have to sand it and repaint without the poly.  I might put the poly around the edge of the back of the doors so that it won't stick when they are closed.  Again....big job.  In addition to that, I aim to refinish the countertops and backsplash.  I'm gonna kind of cheat a bit, if I can.  They are covered in formica, but it is stuck on solidly, so I am just going to sand and score it and lay granite tile right over it.  Should be interesting!  The backsplash will just have to come out and backer board and glass tile installed.

Once all that is done, we have the rest of the rooms to paint.  They just need it.  We are also wanting to paint the outside of the house a lighter taupe color that will complement the bricks and freshen things up a bit.  It sounds like a lot, but we just putter through it as we have time and money to get it done.

There are more ideas scrambling around my brain, but I will just wait and see if they come to fruition first......


Wednesday, May 16, 2012

Play Kitchen - Stage 1

After months and months of pondering and ideas and pinterest and google research, I've finally decided to go ahead with project play kitchen.  It'll be in stages, of course.  Stage one was putting a fabric skirt around this little end table that I picked up from the side of the road next to someone's trash can a long while back.  Its been hanging out in the girls' room waiting for me to make up my mind as to how I wanted to use it.  At first, I had grand ideas of sanding and painting it, but in the interest of it actually ever getting done and being used before my kids get too old for it, I decided it is just fine the way it is.  The kids won't care, that's for sure!   I really can't believe someone was getting rid of this cute little table, but I'm glad they did! ;)

The fabric is a super long valance that came with the crib bedding set I bought a long while back.  It was hanging out in a drawer until I had inspiration this morning and thought of it for the skirt part.  Fits perfectly!  Yay!  I would have wrapped the skirt around the outside, but I like the structure of the legs and like it better this way.  Plus, it gives me wood to use for attaching other objects later. :)


Stage 2 - will include locating a bathroom sink faucet with a long neck for free or on the way cheap, something for the sink bowl, some burner knobs, something I can turn into burners and a towel and pot holder rack.  Possibly something for a shelf and rack for a backsplash of sorts, too...we'll see.

Stage 3 - will beputting it all together.

Until stage 2 and 3 are complete, at least the skirt will hide the growing amounts of pots, pans, dishes and food and will, no doubt, double as an oven.  A teddy bear has already been cooked in the oven. ;p

Monday, March 26, 2012

Photography....my journey so far

I have had an interesting time of it so far.  I have had an interest in photography for a very long time.  I used to do photo shoots with my sister and friends growing up.  I had little 35mm cameras along the way that took really pitiful pictures, but that did NOT deter me.  Plus, I really didn't know any better.  I think the first time I really put any kind of effort into taking pictures in a specific way was when I was in 10th grade (I think it was that year...anyone is welcome to correct me if I am wrong!).  It was in Coach Clay's history class.  He gave us the assignment to go and take pics of historical sites and put together a sort of album.  I got to borrow a kodak, the kind that spits out the pictures right then and there.  I was very intentional about angle and view, though I couldn't do anything with lighting and editing.  Anyway, he gave me a very nice complement about the "feel" and scope of the pictures I had taken and it was a nice feeling.  Fast forward a few years and other cameras, still 35mm, came in and out of my life and then my dad gave me his Canon AE-1.


Still a 35mm, but I could adjust all kinds of things on that sucker!  I had a blast with it, until the shutter started acting all wonky and I couldn't justify getting it fixed.  By then, digital cameras were becoming mainstream and I finally bought the Canon PowerShot A80.


I seriously loved this camera.  We bought it right before Braden was born because I knew I was going to take a bazillion pictures of my first baby!!  And I did. :)  As anyone can tell, I am a Canon fan.  I'm very familiar with this brand and I really like the way they feel in-hand.  I've played around with Nikons and Sonys and other brands, but for me, nothing beats a Canon.  One thing I really liked about this camera, aside from the pretty good pics it took for its size and built-in lens, was the ability to play around with manual settings.  I could also take a pic in black and white, sepia or a number of other settings on the camera itself before any editing had to be done.  I thought it was a fabulous all-around camera.  I miss it from time to time even now.

A few years back, around four or five now, I think, I decided I was going to get a degree in photography from Academy of Art University in San Francisco, CA.  They have an accredited online program that enables you to get up to a Master's degree in Photography.  I was pumped!  Sam was very encouraging of the whole scheme and it wouldn't cost us any money because of my GI Bill.  So, I got registered and enrolled and bought our fabulous IMac and was in process of buying the Canon 40D and the Adobe Photoshop professional version (whichever that was at the time), when everything kind of hit like a ton of bricks.  That's what happens when I don't ask God whether or not I should be doing something. :)  I got to looking at how much time I was going to actually have to carve out for doing assignments and studying and all that jazz and well, it was definitely going to be more than the 9 hours worth of credits I was going to do per week.  Not to mention, we were still living in the motor home and I had Braden and Zekey to attend to, soon to be pregnant with Ailey, though I didn't know it at the time. ;)  Anyway, right about then, I decided the whole process was a no-go, so instead of getting the 40D, which Sam was still all for, I decided to get the digital Rebel.  It was less expensive, would still take great pics and I could still manipulate as I went along.

In those years since I got the camera, I have had seasons of intense interest and photo taking and plenty of seasons of I-don't-have-time-for-this.  I used to edit pictures when I had my little PowerShot because I had some editing software I really liked.


Now, of course, it is no more. :(  Oh, well!  So, for a very loooooong time, I did no editing.


So, I was puttering along mostly taking pics of my own family and then all of a sudden, I seem to have gotten launched into taking pics for other people's family.  I also started editing a lot more.  I found some stuff online and downloaded it and I have been having fun ever since!  I am learning a bunch and I am getting new opportunities to improve.  God knows I like photography.  I believe He placed that desire in me.  Right now, though, I'm trying to find the balance in all of it.  My family is my first priority and I have a tendency to get very focused on something and let everything else hang out on the sidelines until I wear myself out and back off from that thing.  I believe God is teaching me how to prioritize and ask Him if this is something I should be doing and if so, how much and on and on....Its been an interesting ride so far.  I also am not in a place of thinking about this long-term, because it may not be.  It may be just for a season, only God really knows!  I think I'll let Him handle all those details.  So, I stay scheduled with shoots that work out for my and my family's schedule and its not the main thing, which is how it should be for me.


Friday, December 16, 2011

Poser Christmas Tour 2011


  So, I have noticed the web version of the Christmas Home Tours and I really enjoy looking at some of them and getting ideas. ;)  I thought, well maybe I should do one of my house.  Not because it is tour-worthy in any stretch of the imagination, but because it appeals to my sense of humor to do so.  So, without further ado, here we go:

 This is the living room.  I really should have a taken a picture of the other side of the room because it was a mess.  I basically just picked up in front of the couch for aesthetic purposes.

 This is the heavily-ornament-laden Christmas tree.  I plan to add some more to it each year.  Maybe one of these years, I'll have Sam fashion a metal cage shaped like a tree with tons of slots for hanging ornaments and we can just forgo the tree.... :)  I'm thinking  this might be our last year doing the fake tree.

 This is my nod to an artistic shot.  I laid down on my back on the floor and took the pic upside down.  We were considering getting a new tree this year because we really have a hard time fitting the width of the tree in our little living room, but I just couldn't see spending money on a new fake tree, if I could possibly use the one we already have!  So, I just left the bottom section off of it and put it up on our side table.  Works for me!

 An overhead shot.  Yep, I still haven't done any more to the wall since the starburst mirror project. :)

I got this idea from Apartment Therapy...see?  I think I may spray paint the stick white, so you can actually see it against my wall.

121208_DIYfire.jpg


 This is in the bathroom.  I'm not crazy about it and I actually rearranged a bit after I took the pic.  It is still bothering me and I think it is the napkin turned table cloth that is under it all.  Its too dark and everything is blending together.  I'll figure something out. Sam is calling it my little shrine to Christmas....now I'm definitely changing it!!! :)

 A closeup for better observation. :)

 This in 2D looks like a hodepodgy mess.  In 3D, it looks only slightly better.  I think what really makes it all come together is the messy table and Ailey's addition of some building blocks and jingle bells, not too mention the reflection of the school wall in the mirror.

 This is supposed to be our Advent Calendar, but seeing as how I didn't even get it put up until around the 8th and its on a hands-off mirror, I didn't bother this year trying to make that work.  I've got to figure out a better place to put it.

 I got one shelf decorated for the season.  The rest...well, they didn't make the cut this year.

Thought it would be enjoyable to view the whole, um, scene. 

 I cleared the table just for this photo.  I have tried to decorate with things that I can use year round.  Since I have an obliging backyard with trees that don't hesitate to share their branches with me, I went outside and cut this one off of a MUCH larger limb.  Come to think of it, it might have been attached to the stocking "rod"....
I think the bright orange paper lantern lights in the background really add a certain ambience....don't you? 

 This is my wanna-be mantle that is really the top of our bookshelf, that is really supposed to be an entertainment center.  I'm totally not in love with this set up and I will probably arrange and rearrange it until it is time to put everything up.  I have a couple of ideas and it involves taking lots of things off and putting some white stars up there.  Along these lines:
Christmas_Decor_Ideas_by_Ideal_Home_2


and these:

We'll see....more project craziness. :)

 Yeah, there's a whole lotta no inspiration here....

 The top of the computer cabinet.  I'm completely underwhelmed.

This sits in the dining room next to the entryway to the kitchen.  Again, a whole lotta underwhelming inspiration going on here.

In addition to all the other paraphernalia going on in the above pics, I do have a wreath on my front door that I don't care for.  I would like to chuck it and do something like this:


Wsnowflake_reddoor.jpg


and/or this:


I also like these for all the time:

 Images 250Modwhitewreath


Ruffly Felt Rosette Wreath


I want to make this one only in the same way as the ornament ball wreaths above.  I want to get lots of clear and frosted balls in different sizes and make one and then I could just change out the ribbon I hang it with to go with whatever season all year long!


the nesting place (I really LOVE visiting this site! It pops up in the majority of my google searches.;)

Here's another one from the nesting place and I really love how large it is and how you just use paper....


Okay, I'm done.....end of tour...


For now....:)