We are gearing up to start our school year in a couple of days and I had an epiphany...well, of sorts. The kids usually end up all bunking in the same room, so I thought to myself that it would be nice to turn the other bedroom into a homeschool room. As usual, I'm flying by the seat of my pants trying to get it done and I've been toying with the idea of a triple bunk bed for a while. So, Sam went to help our friend move this morning and when he came home, he found me eye deep in pondering how I could possibly turn the boy's current bunk beds into a triple bunk. Didn't want to spend any money, you see. Just wanted to use what we had on hand. He said I was crazy. He's starting to come around to my upcycling obsessiveness. Well, after much collaborating together, we came up with a plan and we (read mostly Sam) went to work on it. :) Poor man is now pooped, but looky at what he built!
The kids are giddy with excitement! They are loving it. We have a few more boards to add after some more money gets allotted for this project. I'm also going to put up curtains on rods for the two lower bunks and a tent for the top. We had all that wood on hand and the two upper bunks are the same metal bases from the previous bunk beds...Now, I need to figure out what to do with the head and foot boards from the other bunks.... ;)
I so wanted to paint the kids' room today. I have some paint out in the garage and was sorely tempted, but I figured I could get to that another day.... I might paint the school room first since it will be mostly empty for a split second before I start setting up shop in there... All I know is that it will feel better in both rooms once the unfortunate colors get hidden under much more soothing neutrals. I think almost 3 years is enough time spent with those colors. :)
Showing posts with label house. Show all posts
Showing posts with label house. Show all posts
Saturday, September 29, 2012
Monday, September 3, 2012
Topiaries, a Wreath and Bookshelf Top-scape
Okay, I've finished my topiaries. Moss is MESSY! I also broke my new glue gun in the process. :( I went with a bigger one so I could get those long glue stick mammerjammers. I got tired of loading the little glue sticks every two seconds (only slight exaggeration ;) into my little glue gun. Anyway, on we go:
I'm putting effort into two other spaces, but I'm not done yet. I'll post pics when I finish. Maybe even in time for actual Fall.
Something out of Whoville, perhaps? Suits me!
I wanted these to be able to stay out all year round. I want to put a bead garland around the two trees in fall colors and then Christmas colored ones in December. I'm going to attempt to make one myself because I have a ton of beads that are just hanging out needing to be used. I may end up replacing that dowel rod with an actual stick from my backyard. We'll see if I feel like messing with it sooner rather than later. :)
I've tried using those vase/bowl-thingies-whatever they are called in my decor in other ways for a while and they never really fit, but I like them for topiary bases.
This is what I have so far. I like it. I think garlands on the two outside topiaries would add a bit of pizzaz.....
I saw a burlap bubble wreath and then another one that had this exact fabric over burlap. I decided that I like the bubble wreath, but didn't want burlap. This is what I ended up with instead.
I'm putting effort into two other spaces, but I'm not done yet. I'll post pics when I finish. Maybe even in time for actual Fall.
Friday, August 31, 2012
Fall, Fall, Please come soon!
I think I'm trying to will it to turn Autumn. Maybe, just maybe if I decorate for Fall, it will just decide to capitulate. It could happen. Really.
I've never really decorated for Autumn or Thanksgiving or any of that. I think I always felt the it was way to close to decorating for Christmastime and therefore too much work and more overwhelming than I needed to mess with. :) This year, for some strange reason, I am inspired! I'm wanting to just have a fun two seasons. Fall is my favorite time of year, followed by winter as a close second. I have some interesting ideas for the environment I would like to create in my house for my family and I don't want to do it last minute, so I'm getting a head start on my project list for the holidays. Then, perhaps, I will be able to chill out and just enjoy the season! It could happen. No, I really mean it. :)
Okay, so here is the first in my series:
These made me think of Cinderella....shiny.
I found these unfinished ceramic craft pumpkins at Hobby Lobby for 40% off, hey-hey! Love Hobby Lobby! Anyway, some burnt umber acrylic paint for the stems and the grooves and then some gold glitter for a bit of bling and I really like how they turned out.
These rather large acorns, too, were 40% off and all they needed was a little glitter to top them off. Shiny makes me happy. :)
I've got some other items in the works and I'm pretty exited to see how they turn out. I'll give you a hint. Topiaries. That is all for now.
Friday, June 1, 2012
Kitchen still in transformation...
Sam's parents came for Memorial Day weekend and got in some great time with the kids and helped us finish another phase of the kitchen update project. Sam took out the breakfast bar that used to nearly block off the kitchen last weekend which completely opened the whole thing up. We can now both be in there and not have to play bumper bums and elbows. We also don't have a bottleneck trying to get in and out of the kitchen now. So much better! The next goal was to take out the prep area and make that area and the existing pantry next to it one big pantry with bifold doors and shallower shelves. It was only supposed to get as far as the framework and the sheetrock done. We were to get the doors and the wood for the shelves next weekend after pay day. ;) However, we would have had a dining table full of pantry items until that happened and Sam's parents wanted to make sure all that stuff could go back into the pantry. So, for early birthday presents, they wanted to gift us the doors and shelving! Isn't that amazing?! So, Memaw a.k.a Sam's mom took us to the store and I picked out the doors and Sam picked out the wood and a couple of other items to make it all work. Sam and his dad a.k.a. Pepaw went back to work and we now have an AMAZING pantry! Our kitchen feels like a whole new room already and I haven't even textured and painted the walls or finished refinishing the cabinets, countertops and all else waiting in the wings in there. Its truly refreshing, I can tell you! You know, cuz I'm telling you right now. ;p Anyway, I believe I have a before pic of the kitchen from when we first moved in, but I want to do a side by side when its all said and done, so I'm just going to post a pic of where we are at this point. ;)
I cannot express what a fantastic present this is! Thank you Memaw and Pepaw for your time, handiwork and materials to make this possible! Thank you, thank you, thank you!!!
Also, the fridge that was here when we moved in had to go on a journey elsewhere. It would make an alarming noise every time the compressor kicked on or off since we were introduced to it, but a couple of weeks and some days ago it started making a sort of chugging sound the whole time it was on. We both took that as a sign that it wasn't going to be keeping our food cold much longer, so I got online and started scoping out possible fridges. I'm a fan of Kenmore and found this one at Sears.com:
They were running a sale at that time and it was just under $700.00 I really like the freezer on the bottom, but 700 is alot little more than I wanted to pay. So, I got on craigslist and found this one:

It was $350.00 and only two years old. Yeah, mo bettah. We went to look at it and I totally didn't think about dimensions or whether it would actually work in the space in the kitchen... God was more than merciful with this whole thing, He was most gracious! I offered $300 for it and that was accepted! Score! We got it home and it didn't quite fit, but Sam only had to make a minor, um, "adjustment" to the cabinetry above it and it went right on in! I love that man! ;) It also has an icemaker, which I'm excited about. Sam is going to make some alterations to the plumbing under the sink....again (he had to in order to install a filtered water faucet for me a few weeks back ;) and we will have auto ice! Woohoo! Its the little things, really... :)
(Pay no attention to the craziness that is my kitchen. We are only focusing on the pantry to the right and the fridge there in the back. Let's all remember that this is a work in progress.....;)
I cannot express what a fantastic present this is! Thank you Memaw and Pepaw for your time, handiwork and materials to make this possible! Thank you, thank you, thank you!!!
Also, the fridge that was here when we moved in had to go on a journey elsewhere. It would make an alarming noise every time the compressor kicked on or off since we were introduced to it, but a couple of weeks and some days ago it started making a sort of chugging sound the whole time it was on. We both took that as a sign that it wasn't going to be keeping our food cold much longer, so I got online and started scoping out possible fridges. I'm a fan of Kenmore and found this one at Sears.com:

They were running a sale at that time and it was just under $700.00 I really like the freezer on the bottom, but 700 is a

It was $350.00 and only two years old. Yeah, mo bettah. We went to look at it and I totally didn't think about dimensions or whether it would actually work in the space in the kitchen... God was more than merciful with this whole thing, He was most gracious! I offered $300 for it and that was accepted! Score! We got it home and it didn't quite fit, but Sam only had to make a minor, um, "adjustment" to the cabinetry above it and it went right on in! I love that man! ;) It also has an icemaker, which I'm excited about. Sam is going to make some alterations to the plumbing under the sink....again (he had to in order to install a filtered water faucet for me a few weeks back ;) and we will have auto ice! Woohoo! Its the little things, really... :)
Wednesday, May 23, 2012
Recent Projects
I've been busy as usual, but I haven't really been putting my projects on here, so I will do that now. I have other posts in progress, but there's a bum-load of pictures involved so it just takes a while for those. ;)
Today, I finished pillow mattress #2. I saw the tutorial on them here at Southern Disposition's blog and was pretty excited when I saw her materials list. She got 1 twin duvet cover and four 99 cent pillows from Ikea. Well, I just had to go ahead and pick that up while I was there about a week or so ago. ;) Her cover was cheaper than the one I found, but for less than 20 bucks, I got two out of 1 cover and 8 pillows. I still can't get over the 99 cent pillows. 99 CENTS! I am in total like with Ikea. :) Anyway, here are the ones I made:
I also had to make up some hair bows for a little girls birthday a couple of weekends ago. I hadn't made any in quite a long time, so I had to get back on youtube to have a refresher course. I must say that these turned out waaaay better than the first set I made a year or so ago. :) I also like that they are more over the top than the others, too. Big honkin' bows on little girls heads just = cuteness to me. Here they are:
I got some super cheap sheets at Ikea while I was there because I had seen this Super Hero Fort Kit on Meg + Andy blog and knew I needed to do that for the boys...well, at least part of it. They kept taking the sheets off of their beds to build forts and it was getting really old trying to put it all back together all the time. :( Anyway, at first we used clothespins to hook it to the bunk beds, but between Brea's and Ailey's efforts, it kept getting pulled down. I had just bought some rope for use at our homeschool group field day and wrapped it "strategically" around the bed and just draped the sheets over the ropes. Aaaahhh...much better. That solved the problem of having to go in a bazillion times at bed time to fix the fort. Here's what the kids have done with it so far:
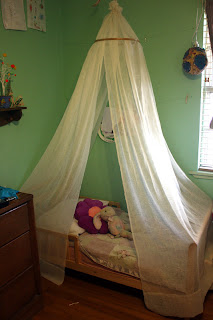
After making that, Ailey wanted one for her bed, so I set out on Google to see what others had come up with. I was looking for something that didn't require sewing and used stuff I already had. I came across this idea here at The Better Nester. I didn't do it exactly, just used it to stimulate ideas to use with what I had. I may or may not do more to it...works just fine the way it is. Here is what I came up with so far:
Our yard was in VERY sad shape after the drought last year, so I went to work taking dominion over that thang! Its finally starting to make a comeback, but it will need more time. Also, the garden is in process, as usual....I think I'm going to have to start it in November for it to produce anything in the spring. ;) Anyway, here is all of that in progress:
Today, I finished pillow mattress #2. I saw the tutorial on them here at Southern Disposition's blog and was pretty excited when I saw her materials list. She got 1 twin duvet cover and four 99 cent pillows from Ikea. Well, I just had to go ahead and pick that up while I was there about a week or so ago. ;) Her cover was cheaper than the one I found, but for less than 20 bucks, I got two out of 1 cover and 8 pillows. I still can't get over the 99 cent pillows. 99 CENTS! I am in total like with Ikea. :) Anyway, here are the ones I made:
I also had to make up some hair bows for a little girls birthday a couple of weekends ago. I hadn't made any in quite a long time, so I had to get back on youtube to have a refresher course. I must say that these turned out waaaay better than the first set I made a year or so ago. :) I also like that they are more over the top than the others, too. Big honkin' bows on little girls heads just = cuteness to me. Here they are:
I got some super cheap sheets at Ikea while I was there because I had seen this Super Hero Fort Kit on Meg + Andy blog and knew I needed to do that for the boys...well, at least part of it. They kept taking the sheets off of their beds to build forts and it was getting really old trying to put it all back together all the time. :( Anyway, at first we used clothespins to hook it to the bunk beds, but between Brea's and Ailey's efforts, it kept getting pulled down. I had just bought some rope for use at our homeschool group field day and wrapped it "strategically" around the bed and just draped the sheets over the ropes. Aaaahhh...much better. That solved the problem of having to go in a bazillion times at bed time to fix the fort. Here's what the kids have done with it so far:
Braden used the excess rope end to make a divider inside, too....
After making that, Ailey wanted one for her bed, so I set out on Google to see what others had come up with. I was looking for something that didn't require sewing and used stuff I already had. I came across this idea here at The Better Nester. I didn't do it exactly, just used it to stimulate ideas to use with what I had. I may or may not do more to it...works just fine the way it is. Here is what I came up with so far:
Our yard was in VERY sad shape after the drought last year, so I went to work taking dominion over that thang! Its finally starting to make a comeback, but it will need more time. Also, the garden is in process, as usual....I think I'm going to have to start it in November for it to produce anything in the spring. ;) Anyway, here is all of that in progress:
The front porch had that icky green fake grass outdoor carpet covering it and I decided it just needed to get taken off. It had it on the back porch, too, and after just letting the weather do it thang to it, all the gunky glue came mostly off of it after a while. I figure by the time I get ready to clean it off really good and stain it, I won't have much scraping to do. ;)
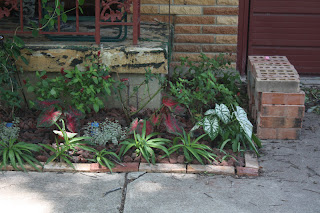
This is the front right flower bed. I took out all the bulbs that were in it, took out the fluted brick edging that didn't match and looked dated and then attempted to restore some order there. There's a rose bush taken from a random spot in the front yard as well as some type of flowering plants taken from the back yard. I had gotten that honey suckle last year and just planted it there in the hopes that it would survive and it did. Yay! It is now being trained up the railing. The border plants next to the bricks I got from one of the other flower beds and I have no idea what they are, but they make a nice bushy border. :) The bricks were free from a friend. I also put a soaker hose we already had and lava rocks in. All the beds were in chaos. Lots of overgrown and not taken care of going on in them. Slowly, but surely I am going through each of them and rearranging and adding a bit.
This flower bed is to the left of the front porch and it had some really sad looking hawthorn bushes in it. There are still two left that are giving me a run for my money, but they WILL come out! Also, where the drain spout it was all loaded with dirt from many years of build up and when I got a hold of it, I found all kinds of buried bricks and stone. I just dug them out and put them back on top in an orderly manner. Much better. I put stepping stones all the way around so I can get to the other beds without tramping on the grass trying to come back in. I aim to bury one per day until they are all mostly level with the top of the ground to make mowing easier. I've got them going out to the mailbox, too.
That pile of bricks there came from our neighbor behind us. They were free, too. :) They will be going in as the border for the other front flower beds.
There are some of the bare spots with new grass coming up. It looks kinda pitiful now, but it was worse.
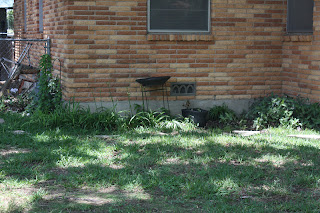
This bed is going to be a challenge...There are lots of bulbs in it, mostly tiger lilies. I have to dig them out and try to dig out that wandering jew, too. I don't want it in there, it just takes right over. :( I have some irises and amaryllis in the back yard and will rearrange this bed to accommodate them all, but much more organized. There are also some chrysanthemums on the side of the house that will find a new home here. :) That black bowl thing is my place marker for a bird bath. I am on the lookout for one...preferably a cast off that won't cost a thing. ;p
This bed has a rose bush and jasmine. I would like to get some sort of wrought iron gate thing or some sort of large trellis to create a bit of privacy there. We shall see what comes my way. :)
Ailey had to be in most of the pics...:) This is the back yard in all of its skeeriness. The kids have really done a number on it. That HUGE bare spot is being worked upon now. Gonna see if I can coax some grass back in there. Eventually, the plan is to make a semicircular patio with a pergola over it off of the small back porch there. We'll see.
The garden.
Herbs are up at the front there and there is some lettuce and kale in the middle and garlic at the other end with the rest being tomatoes. The big huge bush there is oregano and it likes to take over.
The pot has Sam's habanero plant from last year. He hasn't given up on it. It has lots of blooms, but something keeps eating the little peppers on it. ;) Poor Sam! The bed has strawberries, okra, more habaneros and zucchini. There was more planted, but it hasn't shown up as of yet. I'm probably going to have to start those inside and see if I can get them to grow. I may not, though....depends on whether I feel like it or not. ;)
We've also got a lot of remodeling going on inside the house, but most of it is in mid process. I still have to finish getting the wallpaper backing off the walls in the bathroom and then I will texture and paint. I have to sand and repaint the cabinetry, too. I am considering putting in an exhaust fan, so before the texturing and painting, I will have to cut into the wall to run the wires and also cut a hole in the ceiling. Then, I would have to patch the wall. It would be a good thing because there is no ventilation in the bathroom if the window if closed.
Sam is venturing into building a bigger pantry out of the one that is in the front part of the kitchen already and the little inset prep area right next to it. He's going to frame it out and then build some shelves in there and then he will install bifold doors there. We are also going to get bifold doors for the other closet/pantry/craft room at the back of the kitchen. We will replace the hot water heater door with a new door that matches the bifold doors, too. Then, there will be texturing and painting going on for a while after that. He also plans to cut out the subfloor and replace the terrible particle board with plyboard and then we will paint that and lay linoleum tile down.
In the meantime, I have been slowly refinishing the cabinet doors. Ugh. Such a big, time-consuming job! I am painting them an off white and replacing all the hardware. I finished two doors and put a poly coat on them and I don't like it at all! It has yellowed and the polycoat is streaked making it look even worse. I'm gonna have to sand it and repaint without the poly. I might put the poly around the edge of the back of the doors so that it won't stick when they are closed. Again....big job. In addition to that, I aim to refinish the countertops and backsplash. I'm gonna kind of cheat a bit, if I can. They are covered in formica, but it is stuck on solidly, so I am just going to sand and score it and lay granite tile right over it. Should be interesting! The backsplash will just have to come out and backer board and glass tile installed.
Once all that is done, we have the rest of the rooms to paint. They just need it. We are also wanting to paint the outside of the house a lighter taupe color that will complement the bricks and freshen things up a bit. It sounds like a lot, but we just putter through it as we have time and money to get it done.
There are more ideas scrambling around my brain, but I will just wait and see if they come to fruition first......
Monday, October 17, 2011
Latest Semi-Completed Projects
Awhile back, I wrote this post about a table frame that I rescued from the horrifying possibility of front row seating at the local dump. If you are interested or just now joining this party, click here to read that post. Here was the table frame before:

Here is what I did to it:

Here is what I did to it:
I spray painted the frame and sam built a top that fit down in the, um, top. I, along with my trusty and much loved staple gun, stapled the fabric over the top and then topped it off with plastic. Oh, yes I did. (I wonder if I can use "top" any more....) I'm not sold on the fabric I put over the top (yes, I can), but its an easy change and it'll do for now. I think it looks so much better. It looks so clean and new. It just looks like it feels better. :)
The second one I did was this chest of drawers:
This was one of my found-it-on-the-way-to-get-eats-at-Taco-Bell-in-someone's-strange-front-yard-sale. It was an olive green with bunches of flowers on the middle of the drawers and had a distressed England Country-ish sort of look to it. I totally forgot to take a pic of it before I went all spray painty on it, but I am going to go ahead and show this it in its current state. I'm not done with it yet. I am going to stencil the drawers with a geometric pattern in the same cream color as the main body. I might have to poly coat the top, since we use it as a landing strip. I'll put up a pic once it is complete, but who knows when that will happen! It already looks waaaaay better than it did and it, too, will do for now.
Friday, August 5, 2011
In the News...
Well, my news anyway. I'm still working on getting back up to speed with the kiddo updates. I have pictures coming out the wazoo here and I'm trying to keep ahead of the avalanche! I've been sitting at the computer a lot the past few days trying to upload pics to get them developed and starting certain photo projects for gifts and on and on and on...ugh! Anyway, hopefully, I will soon have pics to put in all the frames hanging on the wall.
I've got some projects in mind for the near future, but here's what I'm knee deep into right now. I decided to make the pantry that Sam converted for me only a half pantry. I stuck my craft paraphernalia in there, too. I'm still trying to get it all organized, which might take me the next year or so to accomplish, but here it is so far.....

I couldn't fit everything into the closet and had to leave these two rolling bins in my bedroom, so now I'm trying to figure out how to beautify them. Right now, I'm thinking of getting a piece of plyboard and cutting it to fit across both of the tops and then surround it with a curtain and decoupage or paint the top. Then I can use it as a nightstand. We'll see.
AND...I kept passing a house down the road and kept seeing these chairs sitting outside and then a couple of days ago noticed that they had been moved to the back of the truck in the driveway. I decided to see if the intent was to throw them away and so I stopped and asked. Sure enough, the man was going to throw them away! So, SCORE! I love the lines of these chairs. I'm gonna reupholster them...well, after I've cut two new seat bottoms for the ones that are bottomless. :) Anyway, the bonus is that they pair well with this table that I rescued from being tossed at a neighbor's down the street. I'm just a small step away from dumpster diving.....;p
Oh, and this is on my list for the future - a Play Kitchen!:


I've got some projects in mind for the near future, but here's what I'm knee deep into right now. I decided to make the pantry that Sam converted for me only a half pantry. I stuck my craft paraphernalia in there, too. I'm still trying to get it all organized, which might take me the next year or so to accomplish, but here it is so far.....
I know that I've mentioned in previous posts that I am indeed a ribbon junkie. Here's some proof. This is actually on the low side because I've used a lot of it lately. I'll be stocking up soon...:) I also found this to help me organize all that loose ribbon:

This is the Ribbon Ring and you can buy it here.
This is actually supposed to be the pantry part, but it is hosting some of my craft junk until I can figure out where to put it all!
I couldn't fit everything into the closet and had to leave these two rolling bins in my bedroom, so now I'm trying to figure out how to beautify them. Right now, I'm thinking of getting a piece of plyboard and cutting it to fit across both of the tops and then surround it with a curtain and decoupage or paint the top. Then I can use it as a nightstand. We'll see.
AND...I kept passing a house down the road and kept seeing these chairs sitting outside and then a couple of days ago noticed that they had been moved to the back of the truck in the driveway. I decided to see if the intent was to throw them away and so I stopped and asked. Sure enough, the man was going to throw them away! So, SCORE! I love the lines of these chairs. I'm gonna reupholster them...well, after I've cut two new seat bottoms for the ones that are bottomless. :) Anyway, the bonus is that they pair well with this table that I rescued from being tossed at a neighbor's down the street. I'm just a small step away from dumpster diving.....;p
Oh, and this is on my list for the future - a Play Kitchen!:

Found this one among others here.

Totally in love with the little ruffled curtain on this one. Don't really have room for this kind of spread though. Found this one here.
This one's a beauty! Found it here.
Lovin' this one, too! Found here.

Lookey here at this fancy-schmancy one! They did a really great job on this one. I prolly won't feel like putting this much work into a play kitchen, but it sure is cute! Found here.
This one is my favorite. Sooooo cute! Found it here.
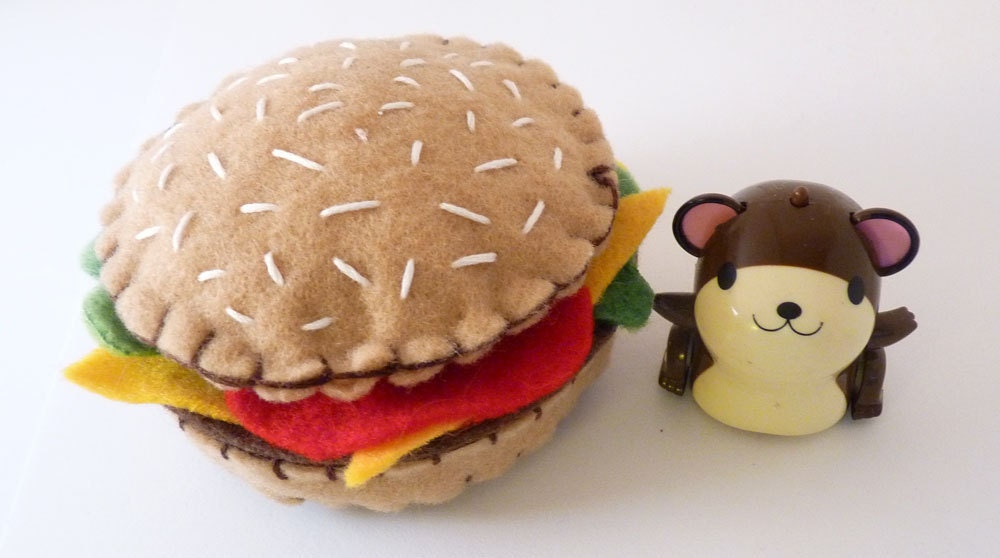
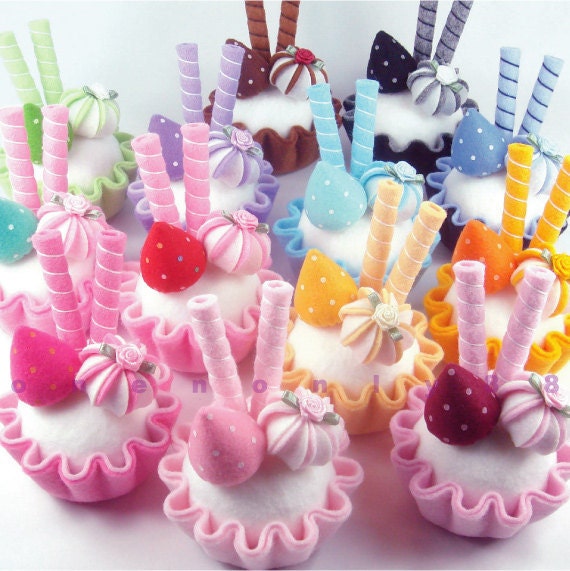
Then, of course, we'll need to furnish it with felt food:
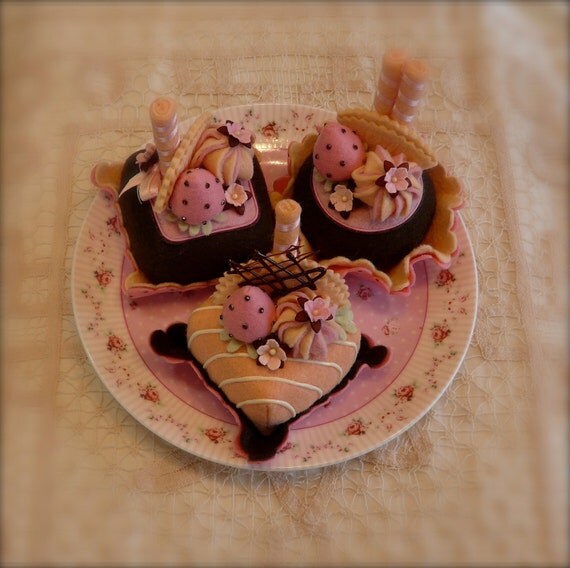
And...Check these out!
Subscribe to:
Posts (Atom)







 Cuteness!!!